主料:
榴莲适量,
红豆沙适量,
印度飞饼适量,
鸡蛋适量
辅料:
熟白芝麻适量榴莲酥的做法步骤
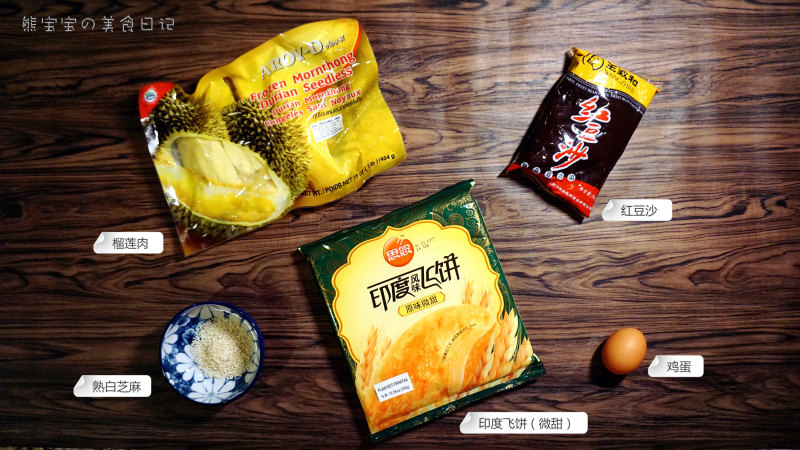
1.食材准备
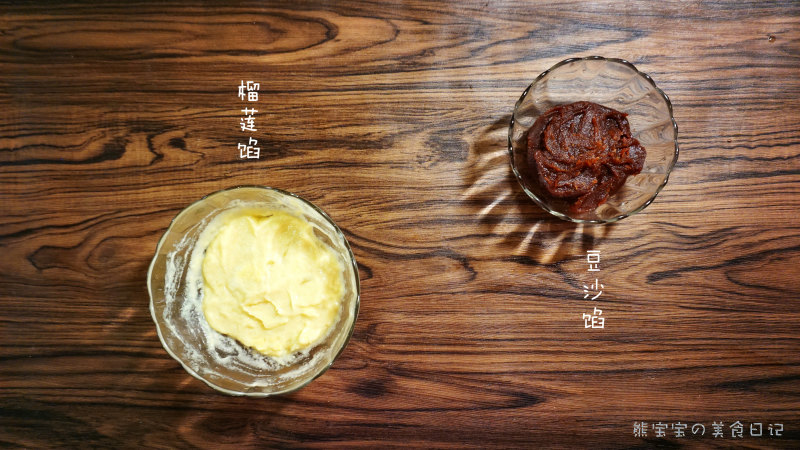
2.分别准备榴莲馅和豆沙馅。榴莲馅中加糖和少许牛奶。
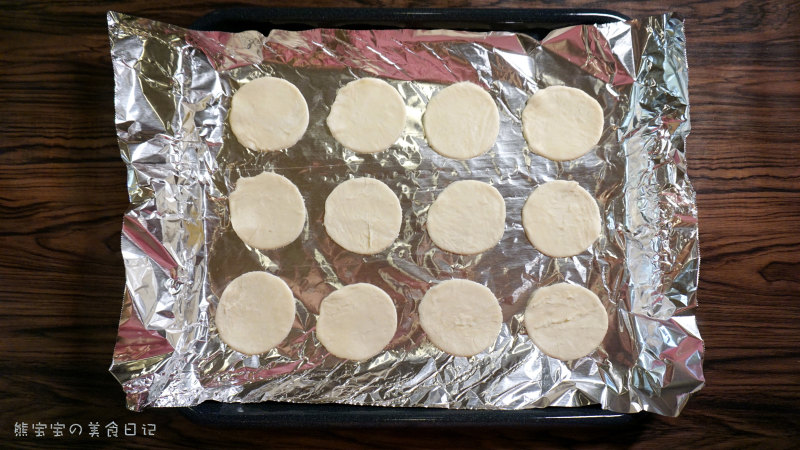
3.飞饼皮解冻,用模具压成想要的形状。榴莲酥的饼皮我压成了圆形,豆沙酥的压成了正方形。
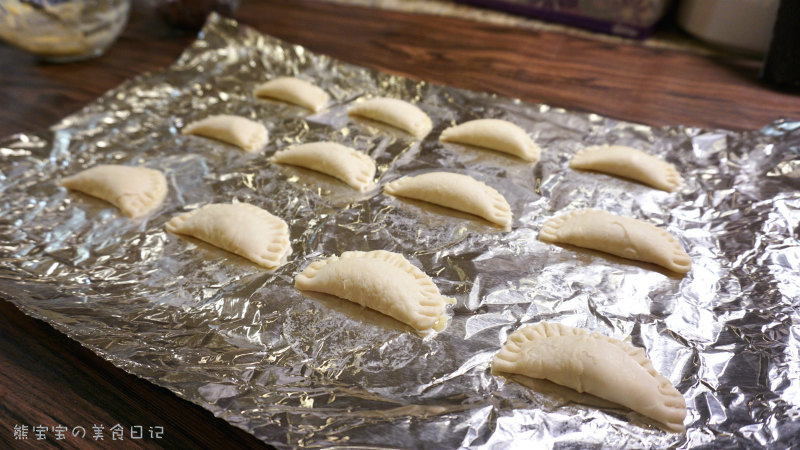
4.分别放入榴莲馅和豆沙馅,对角对折。用叉子背面压出封口的花纹。
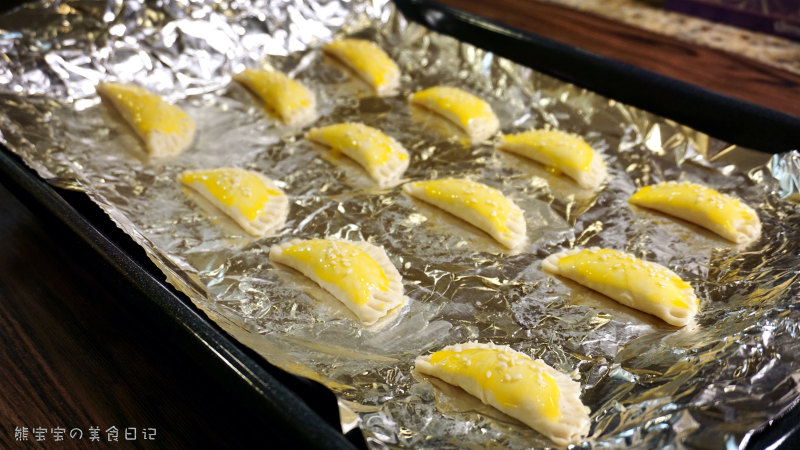
5.分离蛋清蛋黄。在酥皮上涂一层蛋黄液,撒上白芝麻。烤箱180度预热。
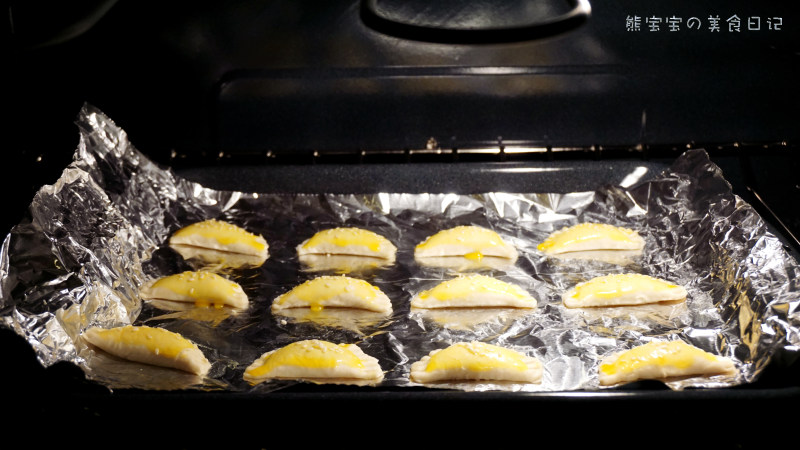
6.入烤箱,180度20分钟左右。直到表皮金黄。
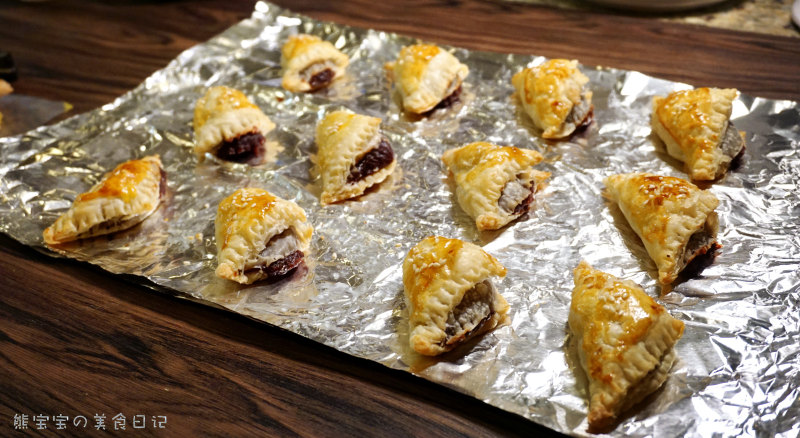
7.出锅啦!
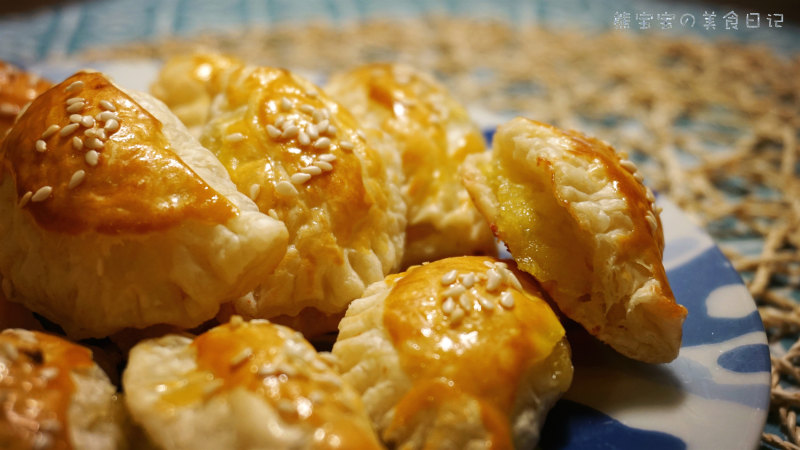
8.凉一凉就可以吃喽!
小窍门&温馨提示
【欢迎大家关注我的微信公众号--熊宝宝的美食日记,让我的美食来温暖您的心与胃??(在微信中搜索“熊宝宝的美食日记”关注即可)】
TAGS:
烘焙 其他菜系 榴莲
免责声明:本站部分文章转载自网络,图文仅供行业学习交流使用,不做任何商业用途。文章仅代表原作者个人观点,其原创性及文章内容中图文的真实性、完整性等未经本站核实,仅供读者参考。
上一篇: 蛋挞菠萝派的做法,蛋挞菠萝派怎么做,蛋挞菠萝派的做法,蛋挞菠萝派的做法窍门,蛋挞版菠萝派,蛋挞皮自制菠萝派
下一篇: 飞饼香蕉派的做法,飞饼香蕉派怎么做,飞饼香蕉派的家常做法,飞饼香蕉派的做法大全,飞饼做香蕉派,手抓饼派 香蕉派
Deprecated: mysql_connect(): The mysql extension is deprecated and will be removed in the future: use mysqli or PDO instead in
/data/haozs.cc/xianguan.php on line
5
Deprecated: mysql_query(): The mysql extension is deprecated and will be removed in the future: use mysqli or PDO instead in
/data/haozs.cc/xianguan.php on line
7
